

Ever found yourself needing to create a PDF on iPhone or iPad, but felt stuck on how to go about it? You’re not alone; many individuals believe that creating a PDF on a smaller screen is a Herculean endeavor. Good news: Apple has simplified the process to the point where it is almost effortless. Everything from websites and photographs to written documents may be converted into a convenient PDF with only a few taps. You can even arrange these files in Apple’s Files app and share them instantaneously across many platforms, adding another degree of convenience to your hectic schedule.
So why should you even care about knowing how to create a PDF on iPhone? Well, PDFs are incredibly versatile. They preserve the style and design of your document across several devices, making them ideal for things like virtual resumes, contracts, or simply retaining a unique memory. You’ll have an extra tool in your digital toolbox with this newfound understanding. No more being tethered to your computer for simple document activities; your iPhone can now perform the job just as effectively.
Advantages of PDF Format
One of the most compelling reasons to create a PDF on iPhone is the unparalleled versatility and compatibility of the PDF format. PDF files are universally recognized and may be viewed on almost any device, without causing any changes to the document’s original formatting, fonts, or graphics. This guarantees that the document will seem exactly as it was designed to, independent of the program or operating system that is being utilized by the viewer.
The capability of simply creating a PDF from your iPhone offers a layer of convenience for document sharing and preservation, which is especially relevant given the widespread adoption of iPhones in both professional and personal settings. Choosing to create a PDF on iPhone comes with a number of benefits, one of which is the high level of security that the PDF format provides. PDF documents can be encrypted and secured using a password, thereby preventing unauthorized access to sensitive information contained inside them. When working with sensitive papers that need to be stored or shared in a safe manner, you will find this to be an especially helpful tool.
In addition, the iPhone’s built-in features make it exceedingly simple to convert a number of different document kinds into PDFs without the need for any additional software. The method is easy to follow, and it doesn’t matter whether you’re working with a photo, a Google Doc, or a file stored in the Files app; the PDF format is not only safe, but it’s also highly user-friendly.
If you want to learn more: 5 Quick Fixes for Split Screen iPad Issues in iOS 15
How to Make a PDF on PDF via the Print Menu
If you’re looking to convert an image or a document into a PDF file on your iPhone, one of the easiest approaches is to utilize the built-in Print menu. This feature is accessible through the device’s Share menu, and it can convert various types of files, including web pages and photos, into PDFs. Here’s a detailed guide on how to accomplish this.
Step 1: Open the File You Want to Convert
First, locate the file you want to turn into a PDF. If it’s a photo, for instance, navigate to your Photos app and open the specific image you’re interested in.
Step 2: Access the Share Menu
After opening the photo or file, you’ll notice a Share button—usually represented by a square with an arrow pointing upward. Tap on this to open the Share menu.
Step 3: Navigate to Print
Within the Share menu, you will see several options. Look for the one that says “Print” and select it. This will lead you away from the options related to AirPrint printers, as they are not needed for this operation.
Step 4: Revisit the Share Menu
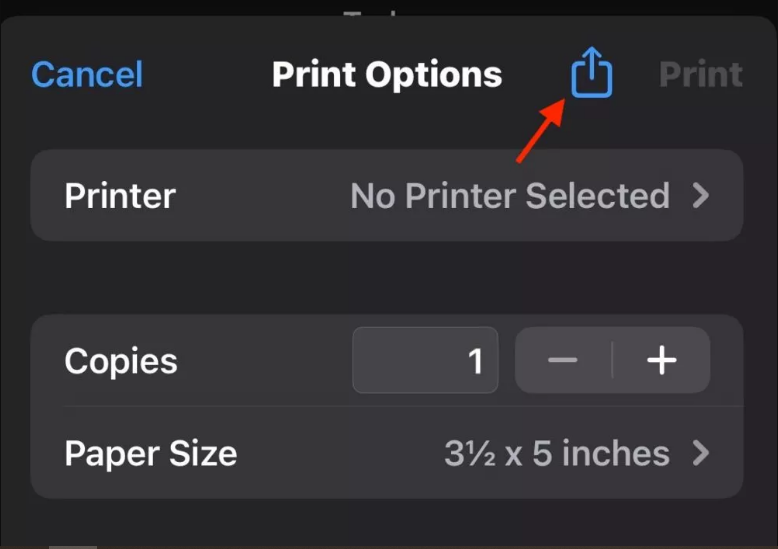
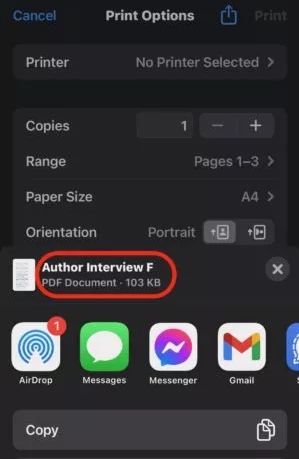
Upon selecting “Print,” another Share icon will appear at the top-right corner of your screen. Tap on this secondary Share button.
Step 5: Complete the PDF Transformation
Once you tap the second Share icon, the file will automatically be converted into a PDF format. A new menu will pop up, prompting you to choose where you’d like to save or send the newly created PDF file. Options often include saving it to the Files app, sending it through an installed application, or uploading it to cloud storage services like Dropbox.
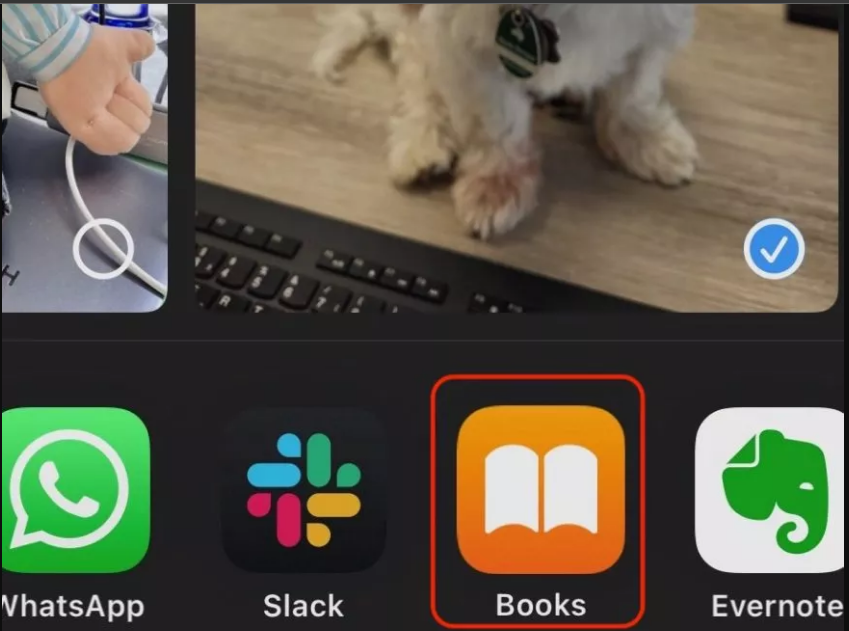
Alternatives: Export to Books
If you want to store your PDFs in a more organized fashion, you can also choose to save them directly to the Books app on your iPhone. Here’s how to convert file to PDF on your iPhone and save it in Books. Instead of selecting “Print,” opt for the “Open in Books” option in the initial Share menu. The photo or document will then be exported to Books as a PDF, where you can conveniently access it later.
And there you have it! These steps detail how you can easily create a PDF file on your iPhone by making the most out of the Print menu within the Share options.
How to Create a PDF on iPhone using the Files App
In the digital world, PDFs are a popular choice for sharing and saving documents. If you’re using an iPhone, you can easily make a PDF using the Files app. Here’s a guide on how to make a PDF on iPhone from text documents using this built-in app.
Before you initiate the conversion process, it’s crucial to move the text document you wish to convert into the Files app. By doing this, you make it easier to manipulate the file and carry out the necessary actions to transform it into a PDF format. You can transfer the document from your email, other storage apps, or directly from your device.
Explore more from us: 5 Proven Fixes For Encryption Credentials Have Expired macOS
Steps to Transform a Document into a PDF Format
To create a PDF on iPhone using the Files app, you’ll need to follow a specific sequence of actions that convert your text-based document into the universally accessible PDF format. First, ensure that the document you wish to convert is already located in your Files app. If it isn’t, go ahead and move the file there.
- Open the Files App: Locate the Files app on your iPhone and tap to open it.
- Find the Document: Browse through your folders in the Files app to find the document you’re interested in converting to PDF.
- Access Share Menu: Once the document is open, look for the ‘Share’ icon (usually represented as a square with an arrow pointing out of it) and tap on it.
- Navigate to Print Options: In the Share menu that pops up, scroll down and tap on the ‘Print’ option. This is the same button you’d use if you were going to print the document using a printer.
- Initiate PDF Creation: After tapping ‘Print,’ another ‘Share’ icon will appear at the top-right corner of your screen. Tap on this icon, and you’ll notice that your document is transformed into a PDF file.

Guidelines for Storing and Distributing the PDF File
Once you successfully create a PDF on iPhone, the next crucial step is to decide what you’ll do with it. Thankfully, Apple provides several avenues for both storing and sharing your newly minted PDF.
- Choose Storage Location: A new menu will appear asking where you’d like to save the PDF. Here, you have the choice to save it in different locations like your iCloud Drive, your device’s internal storage, or third-party storage apps like Dropbox.
- Send via Installed Apps: Alternatively, if you wish to share the PDF right away, you can send it through apps installed on your device such as Mail, Messages, or WhatsApp.
- Export to Reading Apps: Some people prefer to save PDFs in reading apps like Apple Books for easier access later. This option is also available when you’re deciding where to store your PDF.
- Quick Access through Files App: Regardless of where you decide to save it, your PDF will also be accessible through the Files app for future reference.
By following these detailed steps, you can effortlessly create a PDF on your iPhone and then choose the best storage or sharing method that suits your needs.
How to Create a PDF on iPhone using Google Docs
When you’re looking to create a PDF on your iPhone, Google Docs serves as a reliable option. It’s especially useful if you’ve already stored your documents on Google Drive or if you frequently use Google’s suite of productivity apps.
Navigating the Google Docs Interface for Converting to PDF
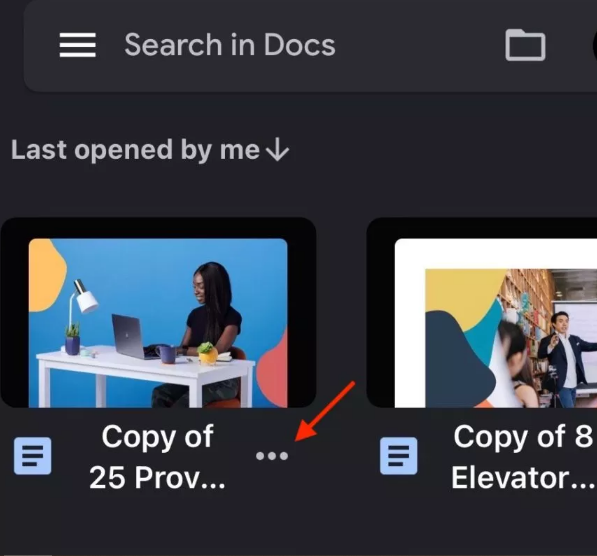
Before diving into the conversion process, make sure your desired document is accessible within the Google Docs app on your iPhone. Open Google Docs and find the document you’d like to convert to PDF. Normally, you’ll see the document listed on the main screen, but if not, use the search function. Once you locate and open the document, you’ll see a set of three vertical dots, often referred to as the “More” or “Options” menu, usually located at the upper-right corner or below the document.
Step-by-Step Procedure to Convert a Document to PDF with Google Docs
- Tap on the three vertical dots (More Options) to bring up a dropdown menu.
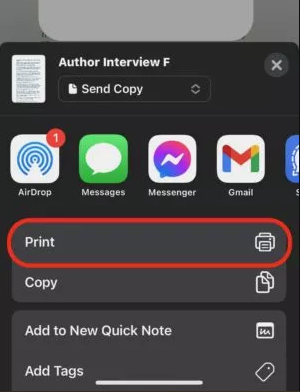
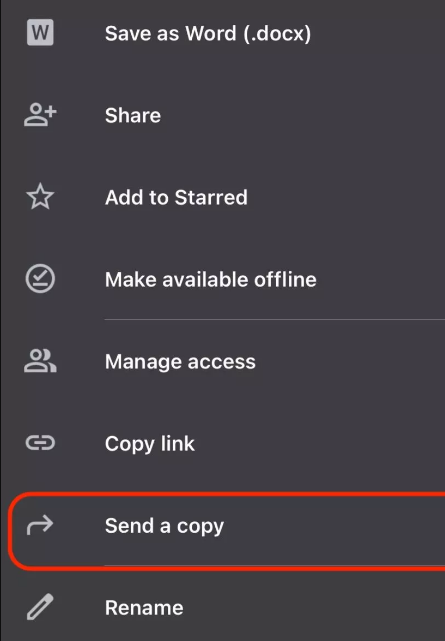
- In the dropdown menu that appears, scroll down and select the “Send a Copy” option.
- Another menu will pop up, presenting you with various file formats. Choose “PDF” from the list.
- Tap “OK” to proceed with the conversion. Google Docs will then generate a PDF version of your document.
- Once the PDF is created, your iPhone’s Share menu will automatically appear, providing various ways to share or save the PDF. You can email it, save it to your Files app, or send it to other platforms.
By following these steps, you can easily create a PDF on an iPhone using Google Docs, making it simpler than ever to save and share your documents in a universally accessible format.
Third-Party Apps
When it comes to the task to create a PDF on iPhone, Apple’s native solutions are incredibly handy, but third-party applications offer even more flexibility and features. Apps such as Adobe Acrobat Reader and PDF Expert not only allow you to read PDFs but also produce them with a variety of customization options. Within these apps, you can effortlessly import files from your device, cloud storage, or even directly from the web and convert them to PDFs. These third-party solutions frequently include built-in scanners, allowing you to immediately convert physical documents to PDFs.
Adobe Acrobat Reader, for example, is a one-stop shop for dealing with PDFs. You may create a PDF on iPhone by opening a file and selecting the “Create PDF” option. Furthermore, Adobe’s powerful technology lets you add comments, sign papers, and even rearrange pages inside your PDF. It’s a highly adaptable application that goes beyond basic PDF production by providing a variety of capabilities for both professional and personal use.
Another high-quality third-party tool, PDF Expert, focuses on the PDF format to provide sophisticated functionality. It lets you fill out forms, highlight text, and add comments in addition to creating PDFs. If you work with PDFs on a regular basis, the advanced capabilities of PDF Expert could be quite useful. It handles huge PDF files incredibly well, with rapid loading times and easy navigation, making it especially beneficial for individuals who need to produce and review lengthy documents. So, if you’re looking to create a PDF on iPhone and need more sophisticated features, PDF Expert could be an excellent choice.
While Apple’s built-in alternatives are enough for most requirements, these third-party programs provide more control and additional capabilities that can be incredibly useful. Whether you’re converting a simple text file or need advanced editing features for a lengthy report, these third-party applications make it easier than ever to create a PDF on iPhone. They are particularly useful for users who frequently work with complicated documents and require additional capabilities for tasks such as editing, annotating, or protecting PDF files.
If you want to learn more: 10 Proven Fixes for AirPlay Not Working Issues
In Conclusion
So you’ve walked with us through the maze of alternatives for how to create a PDF on iPhone or create a PDF on iPad. Isn’t it incredible how smooth Apple has made the process? Whether you’re a student who needs to submit an assignment, a professional who needs to share a project, or simply someone who wants to save an important webpage, the convenience of easily making PDFs cannot be stressed. For text-heavy documents, consider using the Files app. It’s a true game changer that simplifies organizing.
Let’s speak about how to make the most of the skills you’ve just gained. Why not make it a practice to convert essential emails or articles into PDFs on your iPhone on a daily basis? You’ll have them available for reference or even spontaneous reading sessions when you’re offline this way. By incorporating the simple act of making PDFs into your daily routine, you empower yourself to better manage your digital life. So, create a PDF on iPhone today and experience a new level of productivity!